But there are a lot of apps that have CarPlay functionality, and you may not actually need all of them. Unfortunately, these unwanted apps can clog up the CarPlay interface, making it difficult for you to navigate to the apps that you would like to use. Luckily you can choose which apps to use with CarPlay so that you can streamline the connection between your phone and your car and improve your travel experience.
How to Delete a CarPlay App on an iPhone 13
Our guide continues below with additional information on removing CarPlay apps on an iPhone, including pictures of these steps. If you want to uninstall apps entirely instead of just from CarPlay, then find out how to delete apps on iPhone.
How to Get Rid of CarPlay Apps on an iPhone (Guide with Pictures)
The steps in this article were performed on an iPhone 13 in iOS 15.0.2, but will work on most other iPhone models in versions of iOS that support CarPlay. This guide assumes that you have already connected CarPlay through your iPhone with at least one vehicle. If not then you will need to complete the CarPlay connection steps in your car, truck, or SUV first.
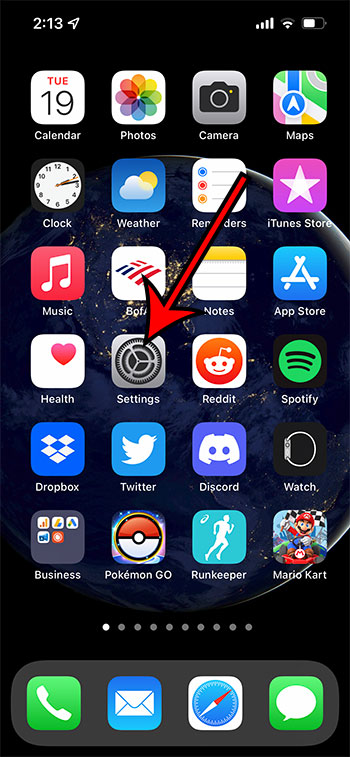
Step 1: Open the Settings app.
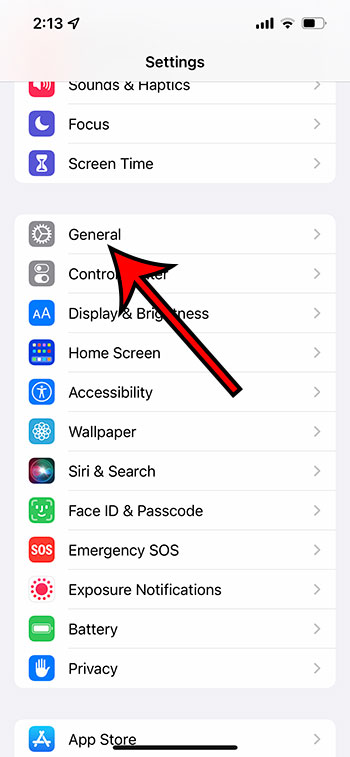
Step 2: Select the General option from the menu.
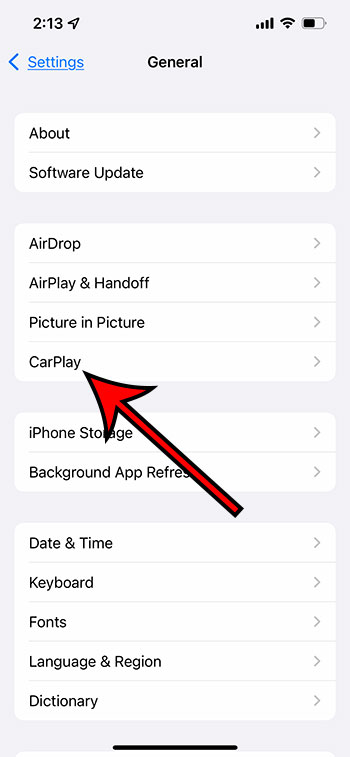
Step 3: Scroll down and choose the CarPlay option.
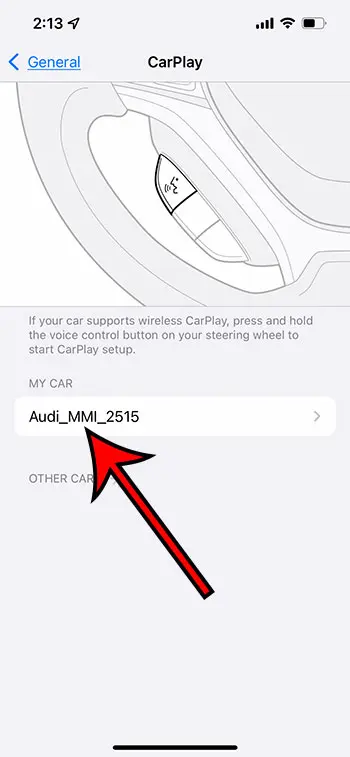
Step 4: Tap the car for which you would like to remove apps.
Note that the CarPlay description may not specifically say the name or model of the vehicle. It might have a description that references the manufacturer’s vehicle software instead.
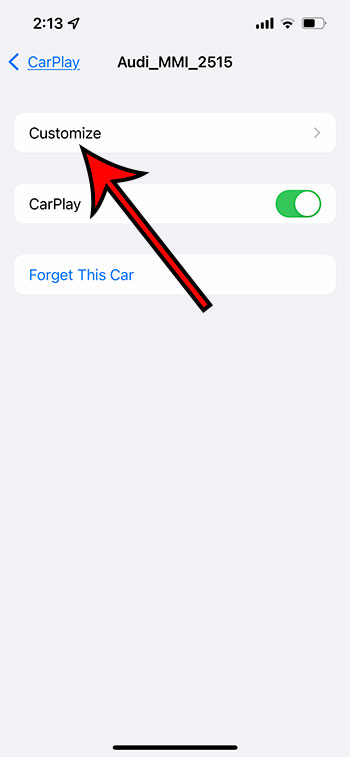
Step 5: Touch the Customize button at the top of the screen.
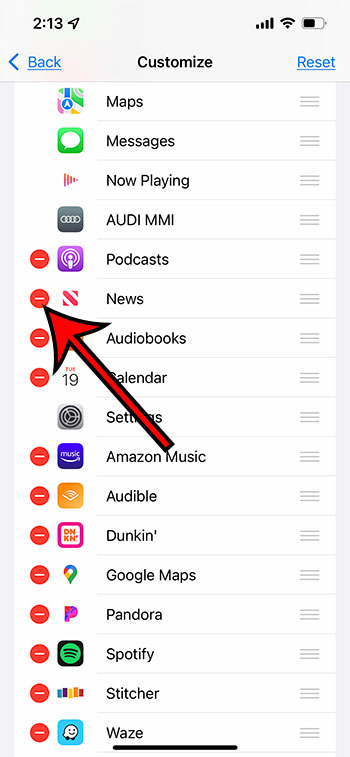
Step 6: Tap the red circle with the dash in it that is next to the app you want to remove.
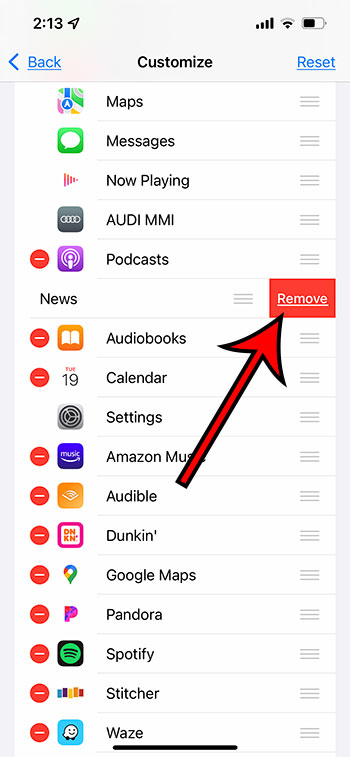
Step 7: Touch the red Remove button to delete that app from CarPlay for your vehicle.
You can then repeat the process of removing additional CarPlay apps until only the apps that you want are remaining.
More Information on How to Remove Apps from CarPlay on an iPhone 13
If you have your iPhone connected to more than one vehicle then you will need to remove those apps from CarPlay for each vehicle. Not every CarPlay app can be removed. You will notice when you open the Customize menu that there aren’t red circles to the left of many of the apps, such as Phone, Music, Maps, and more. These are the default iPhone apps that work with CarPlay, and they can’t be deleted from the interface. If you accidentally delete an app and would like to add it back to CarPlay then you can scroll to the More Apps section at the bottom of the screen and tap the green plus icon to the left of the app. You can also change the order of your apps by tapping on the three horizontal lines to the right of the app, then dragging the app to the desired position. This is something you will probably want to do with the apps that you use most frequently, as it will be easier to navigate to them when they are on the first or second CarPlay Home screen. You can also move unwanted default apps to the bottom of the list so that they are out of the way. For example, I typically use Google Maps instead of Apple Maps, so I put Google Maps near the top of the list and move Apple Maps to the bottom. Removing an app from CarPlay won’t delete that app from your iPhone. It simply removes it from the list of apps that are available in CarPlay for the chosen vehicle. On the screen where you choose the Customize option you will see a CarPlay button and an option to Forget this Car. Turning off the CarPlay button will stop your iPhone from syncing with that car until you turn it back on. Choosing to forget the car will force you to resync your iPhone with that car later if you want to use CarPlay again.
Additional Sources
After receiving his Bachelor’s and Master’s degrees in Computer Science he spent several years working in IT management for small businesses. However, he now works full time writing content online and creating websites. His main writing topics include iPhones, Microsoft Office, Google Apps, Android, and Photoshop, but he has also written about many other tech topics as well. Read his full bio here.
You may opt out at any time. Read our Privacy Policy
